There are as many ways to train a horse as there are horse breeds. When you’re not sure how to train your beginner horse do your research on the methods available. You’ll resonate with a particular method. You need to choose the one that you feel would work best for you. Then you should study it, learn it and use it.
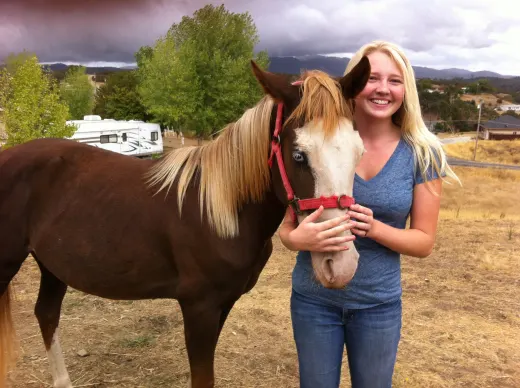
Terms to Know: Colt vs. Foal vs. Filly
I have noticed, to my chagrin, that filly, foal and colt are used interchangeably when someone is talking about young horses. I’ll be using these terms throughout the article, so I’d like to define them.
Each identifies a specific characteristic, except foal:
- A foal is a young horse (baby horse) of either sex.
- A filly is a young female horse.
- A colt is a young male horse.
Filly and colt are not interchangeable; they are distinct labels. While we are on the subject, there are a few other labels I have noticed people are using indiscriminately. They are:
I have noticed, to my chagrin, that filly, foal and colt are used interchangeably when someone is talking about young horses. I’ll be using these terms throughout the article, so I’d like to define them.
Start Training as Soon as Possible
If you are looking forward to a horse ready to ride when it’s two, then start at day one. A foal should not bear the weight of an adult person until it is mature for any reason. Maturity is two years old.
If your horse is heading for the competition world like endurance racing (endurance horses race over a large expanse of land, usually at a fast trot), three or four years old would be preferable.
You want your horse to be sound for many years to come. The horse simply isn’t strong enough to hold a significant amount of weight until they are at least two years old. For an endurance prospect, you’ll want to wait until they are four. But that doesn’t mean you should wait until then to start your training!
Training Schedule
| Age | Appropriate Training |
|---|---|
| Birth 1 year | Halter, tie, lead, groom |
| 1 – 2 years | Intro to bit, saddle, long line |
| 2 – 3 years | Reinforce long line, mount |
Imprinting the Foal
When your foal is born, you want to be sure you are there for imprinting. Imprinting takes place within the first few minutes of birth.
Situate yourself front and center, without crowding the dam. You’re going to imprint like the dam does. When the foal emerges from its mother, and she has begun the cleaning process, you begin your touching process.
Always allow the mare to do her job. She knows what she’s doing. When she licks the foal, it is to help remove the placenta, it stimulates blood circulation in the foal. If she chooses to eat the placenta, let her, but take a good look at it to make sure she passed the entire placenta. Eating the placenta is how she protects her and her foal from predators. Plus, it’s full of nutrients she can use after giving birth. If she chooses not to eat it, DO NOT try to make her. Again, she knows what she’s doing far better than any human, let her be.
Starting from either end, touch every last inch of the foal. Let your hands glide:
- Up the leg over the rump
- Down the tail
- Back up to the rump
- Down the other leg
- Around the belly
- Over the back
- Back down the front legs to each little hoof
- Back up the legs to the chest
- Up to the neck
- Up to the ears
- Down its face to its lips, which may try to suckle any nearby fingers!
The baby will try to stand soon after birth. Complete your imprinting before the foal tries to rise. He will need plenty of room to get those legs underneath him, and he’s gonna be wobbly, STAY OUT of his way! He, like his mother, know what they are doing, let them do it! You could be run into or run over, so be done and out of the way. Resist the temptation to help. They’ve been doing this for thousands of years. Let nature take its course let him try. He can do it!
Halter
Within the first day or two, you’ll want to put a halter on the foal. They have halters in foal sizes. The foal needs to get used to this piece of equipment because it is going to be on him for a large amount of time during his life.
With assistance, you should be able to slip the halter onto the foal’s nose and set the buckle. Take your time. Haltering is a lifelong lesson, so make it a positive one if possible. Now you will leave the halter on.
When you feed the mare, it will be a good time for imprinting. The foal will be right at her side all the time these first few weeks, so use the opportunity to run your hands over the foal. Show him the brush and curry comb, etc. Don’t try to grab the halter to get the foal to come to you or stay at this point. The foal has no idea why you have grabbed it and will very easily rip it out of your hands.
We’ll deal with respecting the halter next.
Lead Line
The lead line is one of the most basic parts of horsemanship. It gets little notoriety for such an important job. A good, strong, leadline is important. The lead line is how we direct the horse. The horse must respect the lead line and stop when requested and follow at a nice distance when requested by a tug.
- To start the relationship with the foal and the lead line, first clip a lead line to his halter. Let him wear it around while at pasture with his dam. The lead line should drag on the ground but not several feet behind. It should be where he can step on it periodically.
- When he accidentally steps on the lead line, he will soon figure out that he must stop to relieve the pulling on his face.
- Essentially, he is teaching himself to stop when the lead is pulled on. It shouldn’t take more than a few days, if that.
- Make sure the leadline is not long enough to wrap around his legs, or the dams legs. Depending on the foals height 2-3 feet is plenty of length.
Tying
By the end of the first week, start thinking of a tall tree you could tie a lead to. The foal needs to learn to tie, now, before he’s big enough to hurt himself resisting.
- Take your lead rope and tie it to a tree that is higher than his head. This is important because if the lead is say, at eye level or lower, the foal can really dig his feet in to resist being tied and hurt himself, or strain himself. At worst, he may be able to pull hard enough that he breaks the lead, and that’s not what you want! If he is able to pull and break the lead, he just taught himself, “I can get out of this if I pull hard enough.”
- So be sure the limb is above his head, yet not so high that he has to raise his head; he should be able to have his head in a comfortable position but not low enough to graze.
- Now step away. If the dragging lead line training went well, then he will realize, in short order, that pulling is fruitless.
- Do expect a good hearty pull at first. Maybe some head swinging, but as long as he isn’t harming himself (i.e. banging his head into the tree, or getting tangled in the lead because it was too long), he will be fine and the worst is over.
- Leave him tied for about fifteen minutes. Never try to approach him if he is in the middle of a fit. Wait until he calms down.
- Do this everyday until when you tie him and walk away he stands quietly. This can take several days, but not more than three or four.
Introducing the Bit
When your foal has mastered leading, it’s time to move onto introducing the bit. A snaffle bit is what is recommended to start your foal with. It’s considered a milder bit, making it good for starting. Personally, I know any bit can be severe, including the snaffle. The first bit won’t have reins attached, so the level of severity is mute. Whether a curb, bar, or snaffle, severity is not the issue with the first bit.
- When you have your foal in an arena, put the headstall with the bit on but not the reins.
- Like the halter, let your foal play with it for a while. Let him walk around the arena, licking and experiencing the bit.
- Do this several days in a row until he is comfortable with it in his mouth, then you can move on. You will know he is comfortable because he will no longer focus on the bit by licking and mouthing the bit. You will be able to put it in his mouth and he will not care.
- Moving on means attaching reins and long lining. This is where the severity of a bit will come into play. If you tend to have a heavy hand, use a low port or one without a port at all. Using a snaffle does not relieve you of the responsibility of using a light hand. Consider a straight bar if you have a heavy hand.
- At this tender stage, any movement on a bit will be noticed by your horse. This is when you are going to set his tolerance on a bit. Hard, heavy, cues will make the horse sour about his bit and callouses will form in his mouth, making ignoring your commands easier and easier over time. A hard yank, or pull further than necessary, will make the bit something hurtful in your horse’s mind.
- Light, consistent, cues are optimum. When your horse responds to light pressure on the rein, you are teaching him that you won’t harm his mouth when he responds. This horse will look forward to the bit as a time he wants to spend with you because there is no pain.
When I introduce the bit, from day one I use the rein to cue a turn. When I place the left rein on his neck, he turns to the right. If I place the right rein on his neck, he turns to the left. This is neck reining from the get-go. The bit is never even engaged.
Saddling
For the saddle, let him see it, be near it, and get familiar with it. Some people will leave the saddle in the paddock or on the rail for a week prior to saddling the foal just for the purpose of reducing his fear of it.
When you choose to saddle your foal, take the saddle pad and starting at his head, rub the saddle pad along his neck, sides and rump. This way he knows it is nothing to fear.
Lay it on his back. Lay the saddle on his back. Set him out in the arena to see if he wants to try and get it off his back. Some will have a bucking fit and others will pad around the arena bored with it.
Long Lines
When your foal is comfortable with the saddle and bridle, it’s time for the long lines. Essentially this involves using two reins that are light weight and about 20 ft long each.
The long lines allow you to walk behind or to the side of your horse. I’m a big fan of long lines for their versatility. Walking behind the horse you instill confidence in them when they must walk out forwards when asked to from behind. He will learn to be confident walking forward alone (with your encouragement from behind). You can use the long lines to guide his body when turning and bending. This will also aid in training for carting if this is in your future. The long lines leading from the bridle along his body, back to you simulates a cart and driving lines. Feeling the soft lines against his legs and side will help get him used to the feel so when you put the steel poles of a cart along his body he will already be used to something running along his legs and side.
Walking next to your horse with the long lines encourages the walk out confidence as well as turning and side passing. At his side, you have access to his body for administering side pressure as well as forward motion.
The first time using long lines you may need assistance. The young horse is used to following his dam, or herd. Walking out in front of you is completely foreign to him. Until he builds trust in you, and confidence in himself, you may need someone to lead him forward when you are behind him and request forward motion. Once he moves forward on command you don’t need an assistant anymore.

You can basically complete your ground training with long lines and when he turns three take your seat in the saddle!