
Do You Love Your Guitar? Restring It!
Do you change the oil in your car? Do you change your clothes? Do you change your mind? Change is good. Change is refreshing and new! The same care and attention paid to our vehicles, clothing, and psyche should be applied to our guitars. If you play a guitar, you probably love that guitar, so take good care of it and it will last you a lifetime.
Guitar strings wear out just like oil, clothes, and minds. When they do, we need to replace them or retire them. If you don’t know how to replace the strings on your guitar, you can hire someone at the local music store to do it, and pay them for a job so simple you’ll wish you had changed your mind along with your guitar strings!
A fresh set of strings is music to my ears. You can hear sweet, clear, clean notes coming off the stings. When the strings wear down, the notes aren’t as crisp and clean. You’ll hear more vibration or the string will sound dull or muted. The metal wrapped around the three low strings, E, A, and D, will eventually separate and the nylon inside will ground to the guitar and sound very dull. In some unfortunate cases, the string will break, sending a whip of metal or nylon flinging in the direction of your face!
A new set of strings is very, very inexpensive. The strings are purchased separately or in a replacement pack of six. I order a pack of each chord. They come in packs of 10 or more, and it costs less than $15.
Let me walk you through the steps of replacing guitar strings. There are several identifying photos so there’s little chance of becoming confused.
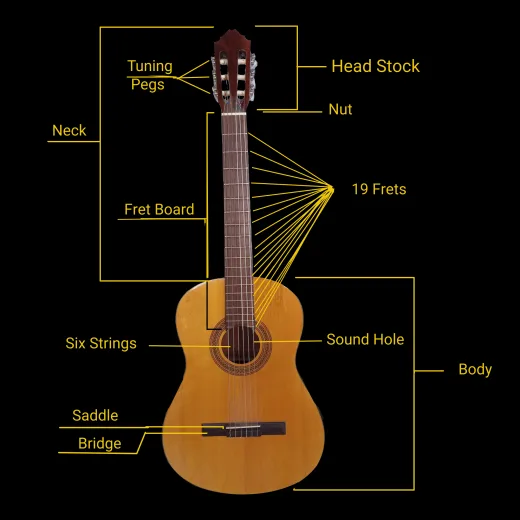
Acoustic Guitar Diagram
String It!
First, you’ll want to purchase the strings. When I replace one, I replace them all, it just makes good sense to me. The music store, record stores like the Warehouse, and online sites like Amazon all sell guitar strings.
Now that you have your guitar strings in hand, let’s restring your guitar!
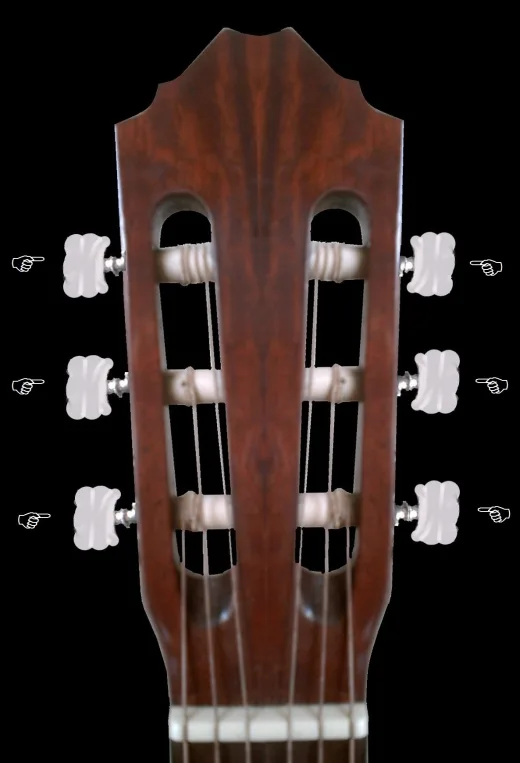
Start at the Headstock
- Start at the headstock. Choose either the low E string or the high E string to start with. It makes it easier to keep track of which one you’ve done if you start at either the high end or the low end as opposed to in the middle somewhere.
- Twist the nut in a fashion that unwinds the string from the nut.
- When the string is unwound, use tweezers or the like to pull the string out of the nut hole.
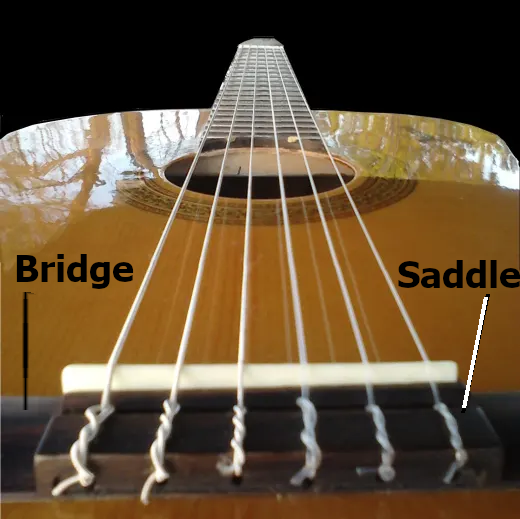
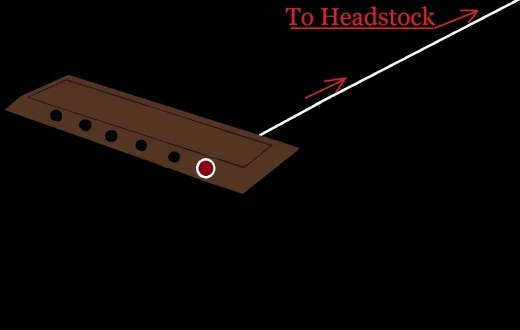
Head Down to the Bridge
Now that you have the string unattached from the nut at the headstock, head down to the bridge where the saddle sits.
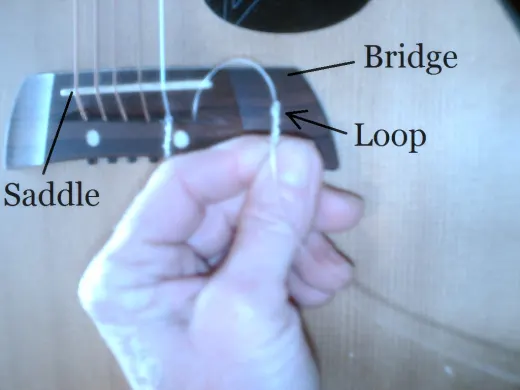
There are several ways the string can be attached to the saddle. Some are looped around onto themselves and others have a small bead that prevents the string from sliding through and so on. I will go over the two types I mentioned above.
- Lift the loop at the bridge enough to be able to slide the string through it. For the type with a bead: slide the string through with the bead still attached.
- Once the string is clear of the loop, slide the whole string through the hole or untwist the loop and slide that side through. Either way, slide the string through the hole on the bridge so it is free of the guitar.
- For the bead type: once the string is free of the guitar, un-twist the string from the bead and keep the bead for the new string.

Choose Your String
OK, so we have the string off the guitar. Select a new string that is the same as the one you just removed. The packages are marked either with a 1 – 6 or their note, i.e., E, A, D, G, B, E respectively.
Guitar strings are made of nylon and steel nowadays. Have you ever heard of the term “catgut”? Before 1946 guitar strings were made of just that; catgut. Someone that really wanted to get hold of that old style surely could. Run a search on the Internet and someone, somewhere, will have it.
Today we’ll be stringing with nylon and steel. Simple observation will alert you if you’re about to put the wrong string on. The nylon strings are very different in texture and appearance from the metal strings.
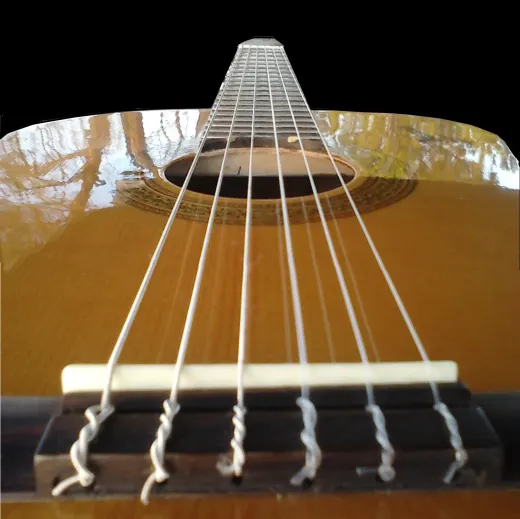
String it Up
First I’ll go over the kind that loops back on itself, then the kind with a retaining bead.
Let’s string it up with the following steps:
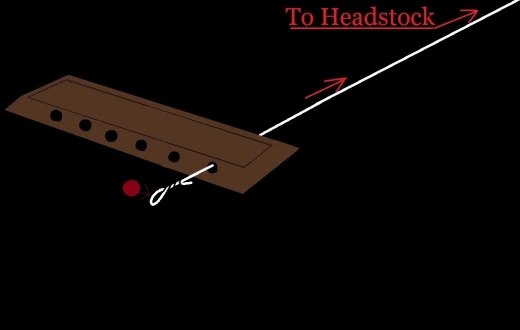
- Take either end of the string and slip it through the hole in the bridge.
- Pull enough string through to form a loop; a short length should do.
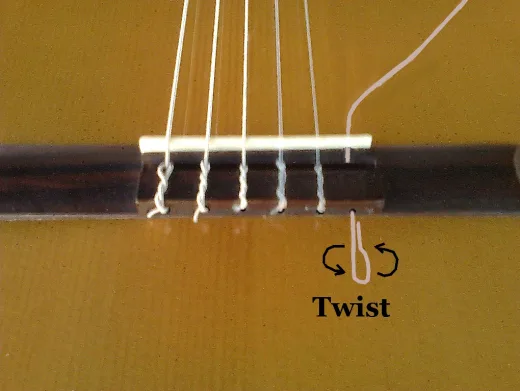
- Twist the loop around itself four or five times.
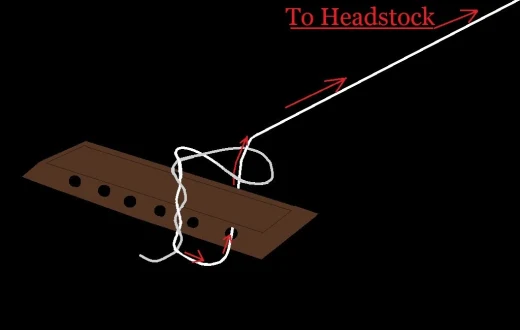
- Take the opposite end of the string and thread it through the loop you just made without letting go of the loop (it will un-twist if you let it go).
- Pull the thread through the loop and continue pulling until all excess string is pulled through and the loop can be placed on the bridge and pulled snugly.
If you have the bead style, follow the previous steps one, two, and three above, but when you get to number four:
- Wrap the string around the bead and slip the loose end back up through the hole.
- Pull the bead up tight against the bridge to secure the string.
Back Up to the Headstock
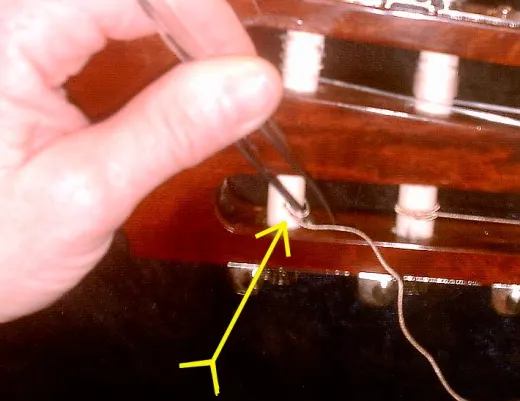
Bring your string back up to the headstock and the same nut that it was removed from. Sometimes, you will have to keep one hand down at the saddle holding the string in place until you start twisting the nut to tighten the string.
- Put the end of the string through the hole in the nut.
- Pull it through the other side.
- Bring it back and pull it through the hole again.
- Turn the nut in a fashion to tighten the string. Preferably in the same direction as the others.
- As the string tightens the knots you created at the other end, at the saddle, will tighten.
- Don’t over-tighten the string. Just make them taunt.
The animation below may make this part clearer.
Go on to the next string and do it all again. You’ll get faster as you go along. When all the strings have been replaced, you’ll need to tune the guitar.
Your guitar is ready to go for a few more rounds now. Enjoy the crisp clear notes. Until next time, thanks for reading!